


Hello developers, Let's learn how to build a chatbot for WhatsApp. This bot will reply to the questions and tasks which are asked of it.
Before building, we need to have some prerequisites. Before starting make sure all these are done.
Install VS-Code
Create an OpenAi account (We are using OpenAi’s ChatGPT for building the chatbot)
install nodejs and npm
for those who don’t know:
Node.js is a popular JavaScript runtime environment that allows developers to execute JavaScript code outside of a web browser
npm stands for Node Package Manager. It is a command-line utility that comes bundled with Node.js, and it is used to manage and distribute Node.js packages
First of all, create a folder and open it on vscode. Then we need to initialize npm in the folder. So open the terminal in vscode and type this
npm init
now we have a node_modules folder and a package.json file. this package.json file is used to describe various aspects of a project. It's in JSON format.
next, install all these packages which we need to build a chatbot. Type this in your terminal to install these packages.
npm install dotenv openai qrcode-terminal whatsapp-web.js
let's understand what these packages do
| dotenv | storing environment variables (we have some secret key, we don't want someone to see this when we push this code into GitHub) |
| openai | We use OpenAi’s APIs for building this ChatBot |
| whatsapp-web.js | Using the WhatsAppWebJS library, developers can create custom chatbots and integrations with third-party services. |
| qrcode-terminal | After building this chatbot. we need to connect it to our WhatsApp account by scanning this QR code. Without this package, we can’t print the qrcode in our terminal. |
We installed all the necessary packages now. Let’s start building
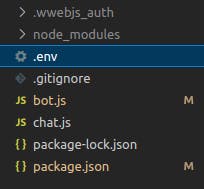
Open the folder in vscode and create 2 files in it
I’m naming those files ‘chat.js’ and ‘bot.js’
bot.js: We write code for integrating WhatsApp
chat.js: We write code for integrating OpenAI API
Now let's start writing some code.
Open the chat.js file and write this. I will explain what these are after the code. Will do like this throughout this blog.
Chat.js
const { Configuration, OpenAIApi } = require("openai");
require('dotenv').config()
const configuration = new Configuration({
    organization: process.env.OPENAI_ORG_KEY,
    apiKey: process.env.OPENAI_API_KEY,

});
In the first line, we are requiring 2 modules from the openai library. The "Configuration" module is used to set configuration options for the OpenAI API, such as the API key, the API endpoint URL, and other options. The "OpenAIApi" module is the main module for interacting with the OpenAI API. It provides a client object that can be used to send requests to the OpenAI API and receive responses.
In the next line, we require the dotenv library, which we will be storing our environment variables, which are our secret keys.
In the third line, we set the configuration options such as the organisation key and API key from OpenAI.
Now let's set the environment variables. I said that these are secret keys. So it shouldn’t be available to the public.
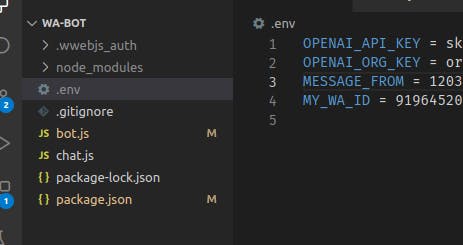
Create a file and name it .env
in this file, we store our openai ORG key and API key. So what are these keys? These keys are unique identifiers that are used to authenticate and authorize access to the OpenAI API.

See there are 2 variables here. Which are
OPENAI_API_KEY = <replace it with your key>
OPENAI_ORG_KEY = <replace it with your key>
For getting your secret key. Go to openai-website for the keys.
After pasting your keys into the file. Keep following this tutorial.
Now we don’t want these keys to get into the hands of other people, which can be dangerous. So we need to hide it before pushing this code to a public repository. First of all, initialize a git repository. We can do it by typing git init in the terminal.
git init
then create a file called
.gitignore
open .gitignore file and paste this
.env
/node_modules
.wwebjs_auth
.wwebjs_auth will be storing our WhatsApp authentication details later. So we don’t need to connect every time we use the bot.
Okay, we have done all the necessary things. Now let's continue coding.
const openai = new OpenAIApi(configuration);
async function ask(prompt) {
    try {
        const completion= await openai.createChatCompletion({
            model: "gpt-3.5-turbo",
            messages: [{"role": "system", "content": "you are a sassy and funny person"},
              {role: "user", content: prompt}],
            });
          return completion.data.choices[0].message.content


    } catch (error) {
        console.log(error.response);
    }
}
module.exports = ask
in the first line, we created a new instance of OpenAiApi and passed our configuration.
Then we wrote the function called ask() in which we passed our prompt as an argument and will return the response to the prompt.
What is inside this ask() function?
we write the code for the bot in a try-catch block.
we called the creatChatCompletion() method from openai which accepts several parameters. What are all the parameters here?
model: Specifies the name of the OpenAI model to use for the chat completion. In this case, the model being used is "gpt-3.5-turbo".messages: an array of objects representing the messages in the chat. Each message is an object with a "role" property (either "user" or "system") and a "content" property (the text of the message). The first message in the array is a system message that says "You are a sassy and funny person". The second message in the array is a user’s message that contains the chat prompt.
The **createChatCompletion()**method returns a Promise that resolves to a completion object. The completion object contains the completed chat, which is generated by the OpenAI model based on the provided messages.
next line we export this ask() method. So we can use it in other modules.
bot.js file
open the bot.js file and write this code.
const ask = require('./chat')
const qrcode = require('qrcode-terminal');
const { Client,LocalAuth} = require('whatsapp-web.js');
require('dotenv').config()
const client = new Client({
    puppeteer: {
        args: ['--no-sandbox'],
    },
    authStrategy: new LocalAuth({
        clientId: "client-one"
      }),
});
now let's understand these codes
In the first line, we required the ask function from the chat.js module that we exported.
Next line, we required qrcode-terminal library, which we will be using for printing qr code in our terminal. so we can connect WhatsApp with our code.
In the next line, we required Client, LocalAuth modules from whatsapp-web.js library. Client module is for people to interact with our bot, Next is LocalAuth. If we don’t use LocalAuth, we have to connect every time we restart the bot.
In the next line, We are creating a new instance of the Client object with configuration options. the **Client**object is using puppeteer, a Node.js library for controlling a headless Chrome or Chromium browser, to automate interactions with a web-based service.
The authStrategyoption is an object that provides authentication configuration options for the client object. In this case, we are using LocalAuth.The **LocalAuth**strategy is configured with a **clientId**option, which is a unique identifier for the specific client application or user accessing the service.
Now let's write code for our app. First, we need to initialize this client. Write this code at the last line of the module.
client.initialize();
Hope you understood this code. Let's move on to the next step. We need to write all the code which we will be writing above the client.initialize();
client.on('qr', qr => {
    qrcode.generate(qr, {small: true});
});
This code sets up an event listener for the qr, an event emitted by the client.
The qr event is typically emitted when a user needs to authenticate with WhatsApp by scanning a QR code using the WhatsApp mobile app. When the event is emitted, the qr parameter is a string containing the data for the QR code.
The event listener uses the qrcode library to generate a small QR code image for the data in the qr parameter. The generate method of the qrcode library accepts two parameters: the data for the QR code, and an options object that can be used to configure the size and appearance of the generated QR code.
In this case, the small option is set to true, which likely generates a smaller QR code image that is more suitable for display in a terminal or command-line interface.
client.on('ready', () => {
    console.log('Client is ready!');
})
This code sets up an event listener for the ready event emitted by a client object. The ready event is typically emitted when the client object has finished initializing and is ready to be used. When the event is emitted, the event listener logs a message to the console that says "Client is ready!".
client.on('message_create', async message => {
    console.log(message);
})
This code sets up an event listener for the message_create event emitted by a client object. The message_create event is typically emitted when a new message is created or received by the client object. When the event is emitted, the event listener logs the message object to the console using console.log() This line of code may not directly impact the bot. But we use it for some other purposes. It will be explained in the below part
client.on('message', async message => {
    try {
        if(message.from === process.env.MESSAGE_FROM){
            if (message.from != process.env.MY_WA_ID) {
                const prompt = message.body
                ask(prompt).then((response) => {
                    message.reply(response)
                }).catch(err => console.log(err))
            }
        }

    } catch (error) {
        console.log(error);
    }
})
This code sets up an event listener for the message event emitted by a client object.
The message event is emitted when a new message is received by the client object. When the event is emitted, the event listener checks if the message is sent from the specified bot account using the message.from property, which contains the sender's WhatsApp ID. If the message is not sent from the our account, the code extracts the message content using message.body and passes it to the ask function to generate a response. The ask function is defined in the chat.js file.
Once the response is generated, the event listener uses the message.reply() method to send the response back to the original sender. If there is an error in processing the message or generating a response, the code logs the error to the console using console.log().
The code is written completely. But it won't work just now. Let's add some environment variables which are MESSAGE_FROM and MY_WA_ID
How to get these values?
On the terminal, write node bot.js . This will start our whatsapp bot.
Next, create a group on our WhatsApp account. Then you send a message. In the terminal, we can see many properties of the message consoled. We want this to reply only when we send a message to that group only. So the value of MESSAGE_FROM is the id of the group. we can get this from the terminal, just copy the value of remote from the terminal and paste it as the value of MESSAGE_FROM key.
Now when somebody sends a message to this group, our whatsapp will reply automatically. Now there is a bug here. When the bot sends a message, it replies to its own message and it goes on and on. So we don’t want the bot to reply when we are sending the message and only other people in the group. So copy the value of message.from from the terminal and paste it as MY_WA_ID value.
now kill the server with Ctrl+C and restart using node bot.js
💡 The source code is available on GitHub. They may be some changes in the code. https://github.com/ashikkabeer/WA-GPT
Hope it's working. Thank you. Share your experience after building on your socials and tag me @my Twitter handle .
follow me on
Twitter: https://twitter.com/ashikkabeerr
LinkedIn: https://www.linkedin.com/in/ashik-kabeer
LinkTree: https://linktr.ee/ashikkabeer